How to Add an Agency to Your Google Analytics Account
Published on:2020-09-20
byJeff Cooper, Founder & Owner, Saltbox Solutions @ Saltbox Solutions
A Quick Guide to Adding Your Agency to Google Analytics
Navigating the world of Google Analytics and managing your account for success can be challenging. For many businesses, this is (thankfully) not your responsibility—it is up to your agency to manage your account and ensure your digital success. However, it is up to you to give them access to your account first. Here is a quick guide (with pictures) on giving your agency access to Google Analytics.
Google Analytics Admin Controls
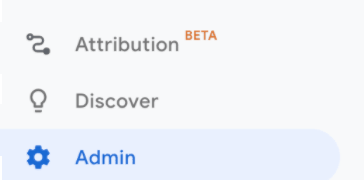
You can begin this process by visiting analytics.google.com and clicking on “Admin” at the very bottom of the left-hand menu. This will bring you to a managerial screen where you can access and edit vital information within your Google Analytics account.
If you have more than one account, make sure you are in the Account, Property, or View that you would like to give your agency access to. These can be adjusted in the top left corner of your screen where the account name is visible. We typically ask for “Account” level access so we can help configure additional properties or views as needed.

Within your desired account, click on “Account User Management,” “Property User Management,” or “View User Management.”

If you do not see these options, make sure you are in the “Admin” view at the top left side of the screen (indicated by the orange underline) rather than the “User” view.

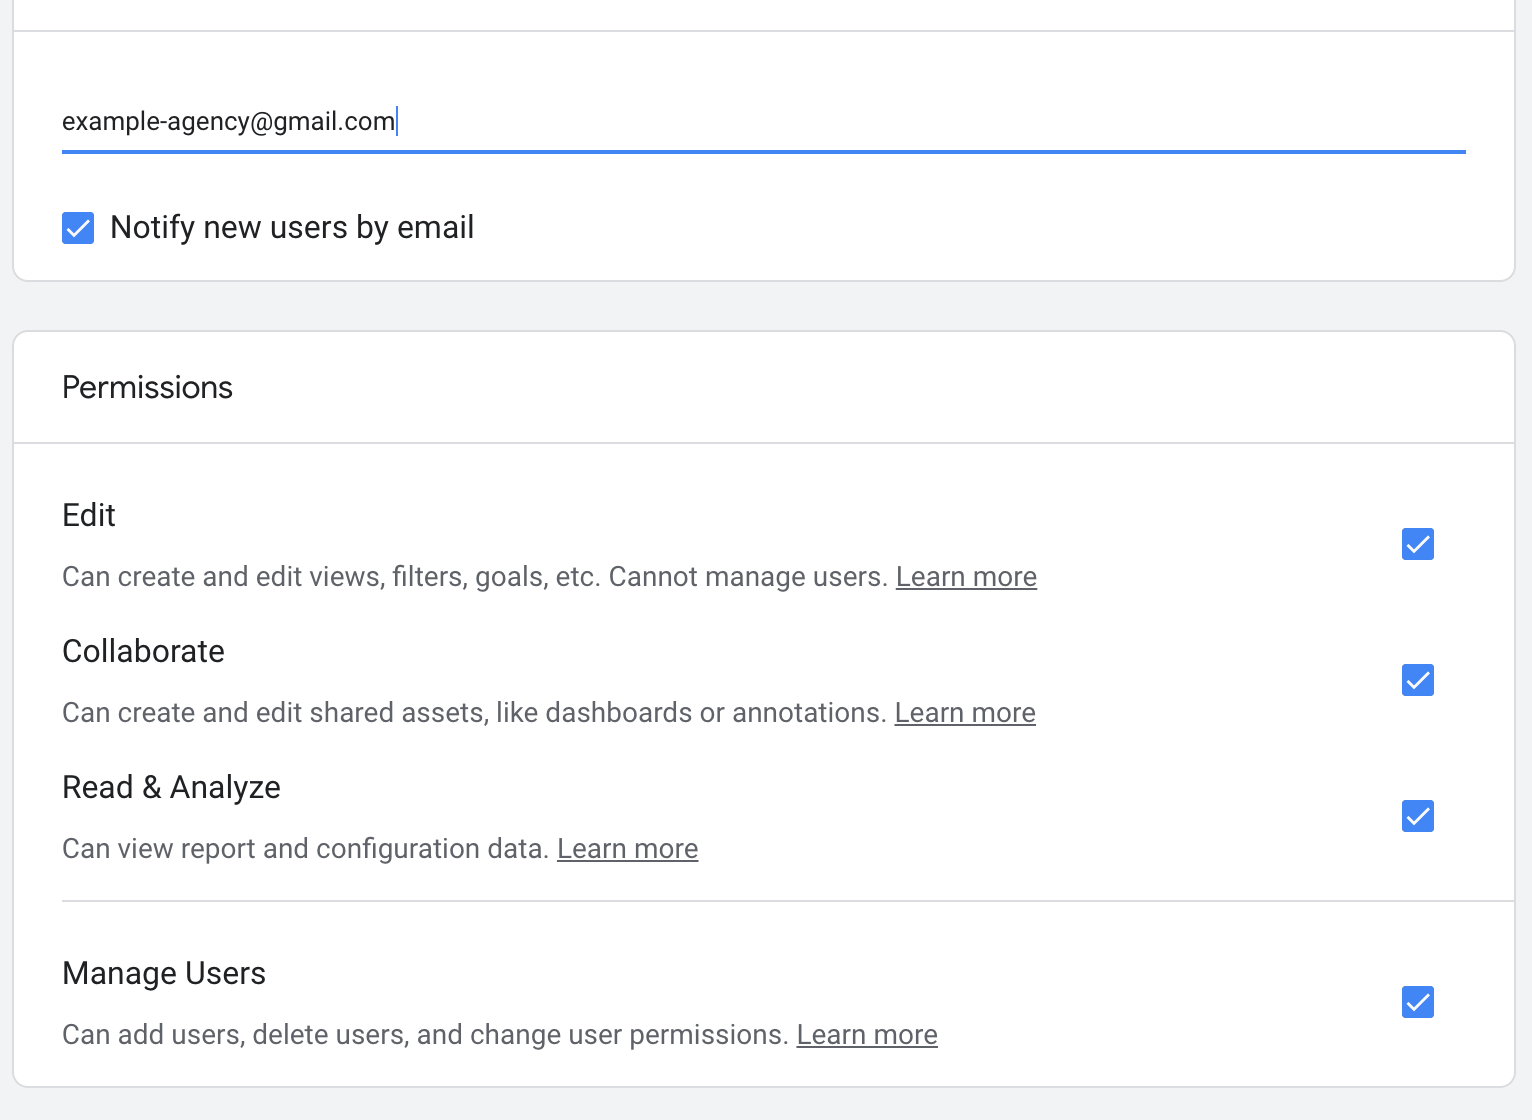
After clicking on the desired user management, a permissions menu will appear. Click the blue plus sign in the top right corner and click “add user” to give your agency access.

Select Analytics Permissions
Before providing access to your account, you need to ensure that you understand the permissions that will be granted to your agency. There are four permissions that you can grant:
Manage Users:
This will allow your agency to add forthcoming members to the account (such as a new hire). This will also give them the ability to remove members (such as former employees).
Edit:
This permission allows your agency to create and view filters, perform their administrative tasks, see report data, and perform report-related tasks.
Collaborate:
This permission allows users to collaborate on shared assets as well as edit, delete, create, and shared personal assets.
Read & Analyze:
This allows your agency to view existing data within Google Analytics and manipulate filters on existing reports.
It is important to note that some of these permissions, by nature, enable others. For example, when you grant “Collaborate” permission, this naturally enables “Read & Analyze.” Similarly, “Edit” naturally enables “Collaborate” permissions.
The “Manage Users” permission allows your agency to grant anyone full permissions, including themselves. It is best to provide your agency with all of these permissions so that they can fully support your account.
It is also helpful if the “Notify new users by email” box is enabled so that your agency can see that you have added them to the account.
Once you have selected the desired permissions, click “Add” in the top right corner of the screen. This will send access to your agency so that they can begin working within your Google Analytics account.
Adding a user to your Google Analytics account is easier than you may think; however, don’t be afraid to reach out to your agency for further support if you run into any issues.
If you need help managing your Google Analytics account, reach out to the Saltbox team to see how we can help.


Jeff Cooper
Founder & Owner, Saltbox Solutions, Saltbox Solutions
Jeff Cooper founded Saltbox Solutions to help B2B software, cybersecurity, and professional services companies attract and convert more customers online. Combining expertise in marketing strategy, software development, and analytics; Jeff has spent over 15 years building scalable, results-driven programs that deliver measurable growth. Earlier in his career, he led digital acquisition initiatives for major consumer product, technology, and insurance brands including Bass Pro Shops, RackSpace, La-Z-Boy, and HealthMarkets.
Today, Jeff serves as an advisor and owner of Saltbox Solutions, guiding strategy and innovation while exploring new ways to apply AI and automation to client campaigns. His focus remains on helping businesses achieve predictable, sustainable growth through data-driven decision-making and cutting-edge technology.